
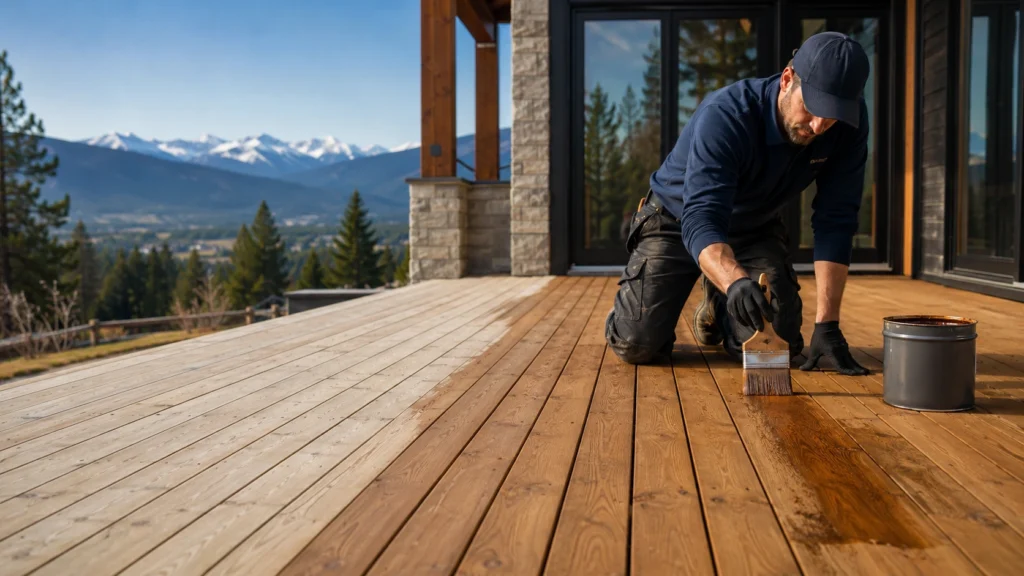
Homeowners do not need to stain pressure treated wood for basic protection against insects, fungal decay and rot because preservatives are already forced into the lumber during treatment. However, staining exposed pressure-treated wood is usually recommended once it has dried sufficiently. A suitable exterior stain improves wood framing appearance and helps protect the surface from ultraviolet light, moisture changes, cracking and premature weathering. The right time to apply it depends on the lumber’s condition not simply how many weeks or months have passed.
What Does Pressure Treatment Protect Against?
Pressure treatment pushes chemical preservatives deep into the wood fibres. These preservatives make the lumber more resistant to fungi, decay and wood-damaging insects. This is why treated lumber is commonly used for decks, fences, exterior stairs and components positioned near concrete or exposed to moisture.
However, pressure treatment and exterior staining serve different purposes. Treatment protects the wood internally against biological deterioration, while stain protects and colours the exposed surface.
Without a suitable finish, pressure-treated lumber can still experience:
- Greying caused by ultraviolet exposure
- Surface cracks and checking
- Repeated swelling and shrinking
- Splintering and roughening
- Warping or cupping
- Mildew and surface discolouration
- Uneven weathering
Staining will not make poorly installed lumber structurally sound. Correct material selection, drainage, flashing, fastening and construction remain essential to the long-term performance of any exterior wood project.
When Should Pressure-Treated Wood Be Stained?
There is no universal waiting period for staining new pressure-treated wood. Advice to wait three or six months may provide a general estimate, but it should not replace an assessment of the actual lumber.
Drying time is affected by:
- Whether the lumber was sold wet or kiln-dried
- Wood species and board thickness
- Sunlight and airflow
- Rain, snow and humidity
- Seasonal temperatures
- Shaded or covered conditions
- Factory-applied water repellents
- How tightly the boards are installed
Alberta’s dry air and strong sunlight can make a board’s surface appear ready while moisture remains deeper inside. Covered sections, board ends and areas with limited airflow may also dry more slowly. Several parts of the project should therefore be tested before staining begins.
Read the Lumber End Tag
The lumber end tag can identify the preservative treatment, intended exposure and whether the board was kiln-dried after treatment. Lumber marked KDAT, meaning kiln-dried after treatment, may be ready for finishing sooner than wet-treated lumber.
Some treated wood also contains a factory-applied water repellent. In that situation, water and stain may bead on the surface even when the board is no longer excessively wet. The end tag helps explain how the product was treated and what finishing instructions should be followed.
Perform the Water-Drop Test
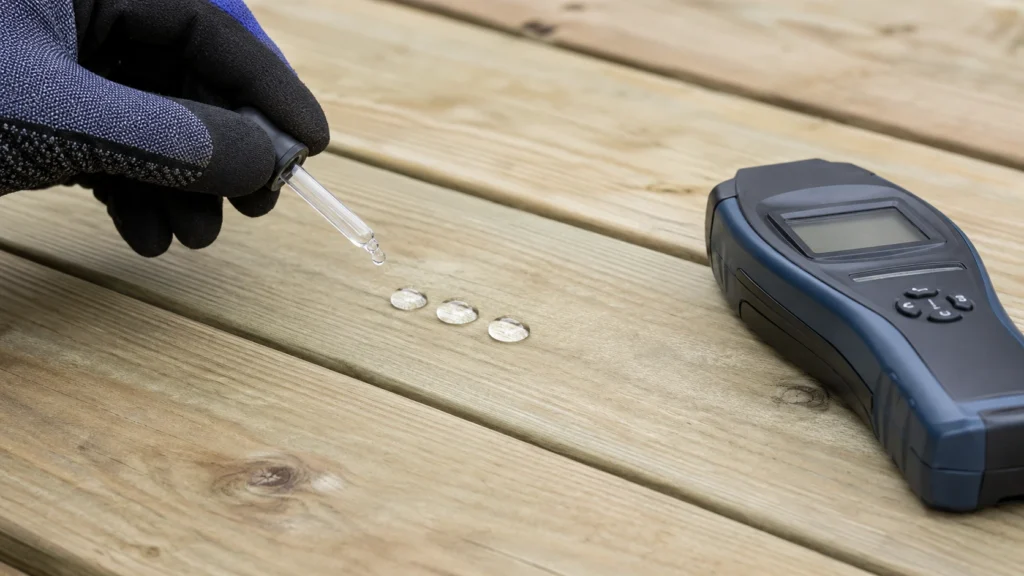
The water-drop test is a simple way to determine whether pressure-treated wood is ready for stain.
A small amount of clean water should be sprinkled on several areas of the surface. If the water beads or remains on top, the wood is not ready to absorb stain. If it soaks into the lumber within several minutes, the surface is likely porous enough for finishing.
The test should be completed on sunny, shaded and less-ventilated areas. One dry board does not confirm that the entire deck, fence or outdoor structure is ready.
Check the Moisture Content
A moisture meter provides a more precise assessment, especially on larger projects. Many exterior coatings require moisture content to be approximately 15% or lower, although the acceptable level varies by product.
Wood species and chemical preservatives can affect moisture-meter readings. A professional assessment should therefore consider the meter’s instructions, treatment type and coating manufacturer’s requirements. The product label should always take priority over a general moisture percentage found online.
What Happens If Treated Wood Is Stained Too Soon?
Staining wet pressure-treated wood prevents the finish from penetrating and bonding with the wood fibres. Instead, the coating may remain on the damp surface and cure unevenly.
Common results include:
- Blotchy or inconsistent colour
- Shiny and dull patches
- Poor stain penetration
- Slow or incomplete curing
- Peeling and flaking
- Visible lap marks
- Premature finish failure
Applying a heavier coat will not correct a moisture problem. Failed stain may eventually need to be cleaned, stripped or sanded before the surface can be refinished. Testing the wood before application is normally easier and less expensive than correcting a failed coating.
What Is the Best Stain for Pressure-Treated Wood?
The best stain for pressure-treated wood depends on the project, exposure, desired appearance and future maintenance. The selected product should be clearly labelled for exterior use and compatible with pressure-treated lumber.
Transparent, Semi-Transparent and Solid Stains
| Stain type | Appearance | Protection | Suitable applications |
|---|---|---|---|
| Transparent | Shows most of the natural grain | Limited UV protection | Newer wood in lower-exposure areas |
| Semi-transparent | Adds colour while preserving the grain | Balanced UV and moisture protection | Decks, fences, stairs and railings |
| Solid stain | Hides most grain and colour variation | Greater UV coverage | Older or unevenly weathered wood |
A semi-transparent exterior stain is often a practical choice for new treated lumber. It provides pigment and surface protection while allowing the wood grain to remain visible.
Solid stain can improve the appearance of older boards with colour variation or previous weathering. However, it may require more preparation when the surface is refinished later.
Oil-Based Versus Water-Based Stain
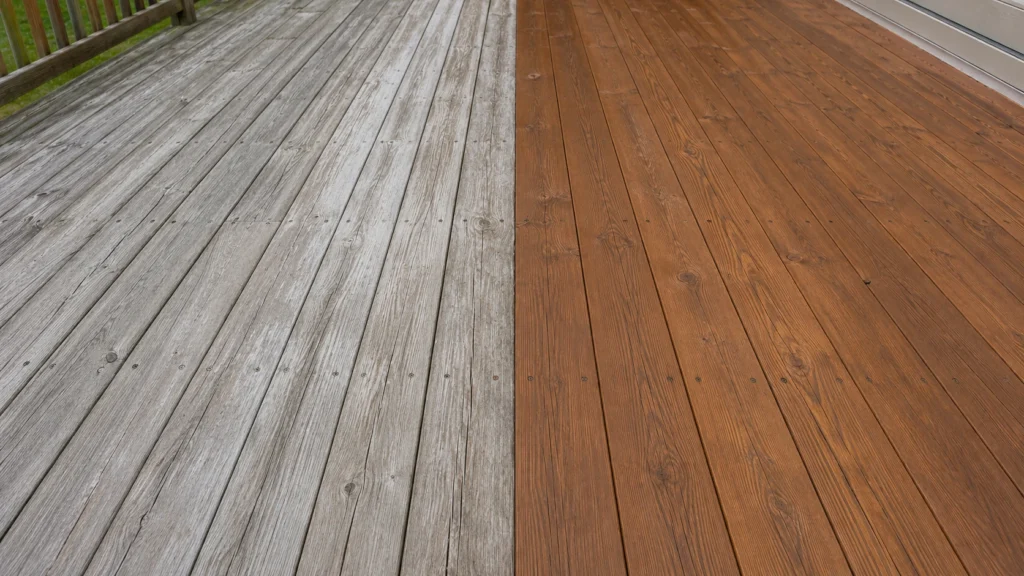
Oil-based stains are known for penetrating wood and producing a natural finish. Water-based stains generally dry faster, produce less odour and are easier to clean up.
Neither formulation is automatically better for every project. Modern oil- and water-based products vary considerably in quality and performance. The correct choice depends on:
- The wood’s condition
- Previous coatings
- Sun and moisture exposure
- Expected foot traffic
- Drying conditions
- Local product regulations
- Manufacturer recommendations
A high-quality exterior stain that is properly applied to dry, prepared lumber will generally perform better than a poorly matched product selected only because it is oil- or water-based.
How to Stain Pressure-Treated Wood Properly
1. Inspect the Wood
The surface should be checked for moisture, dirt, mildew, mill glaze, loose fibres and previous coatings. Damaged, split or badly warped boards should be repaired or replaced before finishing.
2. Clean the Surface
New lumber may require only light cleaning, while older treated wood may need an exterior wood cleaner. Dirt, pollen, mildew and old finish can prevent consistent stain penetration.
Pressure washing should be completed carefully because excessive pressure can damage softer wood fibres. After cleaning, the lumber must be allowed to dry and should be tested again.
3. Check the Weather
Staining should be scheduled during a stable dry period. The required temperature and rain-free window will depend on the selected product.
Direct midday sunlight can make stain dry too quickly, causing uneven absorption and lap marks. In Calgary and other parts of Alberta, changing temperatures, wind and unexpected rainfall should be considered before work begins.
4. Test the Colour and Absorption
A small, less-visible area should be stained first. Pressure-treated wood can absorb pigment differently across boards, so the final appearance may not match the colour displayed on the container.
The test area can also reveal whether the stain is penetrating correctly or remaining on the surface.
5. Mix the Stain Thoroughly
Pigment can settle during storage. The product should be mixed before application and periodically while the work continues.
When several containers are required, combining them into one larger container often called boxing the stain can reduce slight colour differences between manufacturing batches.
6. Apply an Even Coat
Stain should be applied in the direction of the wood grain while maintaining a wet edge. Brushes, pads and rollers can all be effective when approved by the product manufacturer.
Sprayed stain should normally be back-brushed so that it penetrates evenly and does not collect in heavy areas. Board ends and rough-sawn surfaces may absorb more material than smooth faces.
The number of coats should come directly from the product instructions. Some penetrating stains require only one coat, while other coating systems are designed for two.
7. Allow the Finish to Cure
Furniture, foot traffic, sprinklers and rain should be kept away from the surface until the stain has cured. A surface that feels dry may not be fully cured, particularly during cooler or more humid weather.
Is It Better to Stain or Seal Pressure-Treated Wood?
Stain and sealer perform related but different functions. Clear sealer primarily reduces water absorption, while pigmented exterior stain also helps protect the wood from ultraviolet light.
A stain-and-sealer combination is often suitable for exposed pressure-treated wood because it provides both colour and water resistance. However, a separate clear sealer should not automatically be applied over stained wood. Incompatible products can prevent bonding or create an uneven film.
The complete finishing system should follow one manufacturer’s recommendations whenever possible.
Can Pressure-Treated Wood Be Left Unstained?
Pressure-treated wood can remain unstained and still retain its built-in protection against insects and decay. Leaving it unfinished does not mean the lumber will immediately rot.
However, the exposed surface will gradually weather. Unstained treated wood commonly turns grey, becomes rougher and develops small surface cracks. These changes do not always indicate structural failure, but they affect appearance and can increase maintenance requirements.
Horizontal surfaces such as deck boards and exterior stairs benefit more from finishing because they receive direct sunlight, standing moisture and physical wear. Vertical fence boards normally experience less wear, while concealed structural components may not require a decorative finish at all.
How Often Should Pressure-Treated Wood Be Restained?
Many exposed wood surfaces need refinishing every two to four years, but the actual schedule depends on the stain, climate, exposure and level of use. A heavily used deck floor may require attention sooner than a vertical fence or covered railing.
The condition of the finish is more important than its age. Signs that treated wood may need restaining include:
- Noticeable colour fading
- Bare or uneven patches
- Rapid water absorption
- Increasing surface roughness
- Small cracks or checking
- Reduced water beading
Cleaning the wood regularly, keeping gaps free of debris and correcting drainage problems can help the finish last longer.
Common Mistakes When Staining Treated Lumber
Many coating failures are caused by preparation and application errors rather than poor-quality stain. The most common mistakes include:
- Staining wood that is still wet
- Relying only on a fixed waiting period
- Skipping surface cleaning
- Applying stain in strong direct sunlight
- Using interior stain outdoors
- Applying more coats than recommended
- Failing to mix the stain during application
- Staining before rain or cold weather
- Applying a new finish over an incompatible coating
Professional-looking results come from moisture testing, correct preparation and careful application not from applying the thickest possible coat.
Making the Right Choice for Pressure-Treated Wood
So, do you need to stain pressure treated wood? Staining is not required for the preservatives to protect the lumber from insects and decay, but it is recommended for exposed wood that needs better appearance, UV resistance and protection from surface weathering.
The most reliable approach is to let the lumber dry, inspect its end tag, test its ability to absorb water and follow the chosen stain’s instructions. From a professional framing perspective, stain should be treated as part of exterior maintenance not as a substitute for accurate framing, correct materials, proper flashing or effective drainage.
For structural wood projects in Calgary and across Alberta, Woodzio Framing provides professional framing focused on accuracy, dependable scheduling and inspection-ready construction.
Frequently Asked Questions
How long should pressure-treated wood dry before staining?
Pressure-treated wood may require several weeks or several months to dry. The exact time depends on the treatment, initial moisture, board thickness, airflow and weather. The water-drop test, end tag, moisture reading and stain instructions provide a more reliable answer than a fixed waiting period.
Can pressure-treated wood be stained immediately?
Wet-treated lumber should not be stained immediately. Kiln-dried-after-treatment lumber may be ready sooner, but it should still absorb water and satisfy the coating manufacturer’s moisture requirements before application.
What is the best stain for pressure-treated wood?
A quality semi-transparent exterior stain is suitable for many decks, fences, railings and stairs. It preserves some visible grain while providing pigment and surface protection. The final selection should be based on exposure, previous coatings and manufacturer compatibility.
Does pressure-treated wood need to be sealed?
Pressure-treated wood does not require sealing for its preservative treatment to remain effective. However, a suitable sealer or stain-and-sealer product can reduce surface moisture absorption and slow weathering.
Can wet pressure-treated wood be stained?
Wet pressure-treated wood should not be stained. Excess moisture can prevent penetration, slow curing and cause uneven colour or premature coating failure.
Is sanding necessary before staining treated wood?
Light sanding can remove rough fibres, stamps and minor imperfections. Excessive sanding may change how the wood absorbs stain. Appropriate gloves, eye protection and respiratory protection should be used, and treated-wood dust and scraps should be disposed of properly rather than burned.